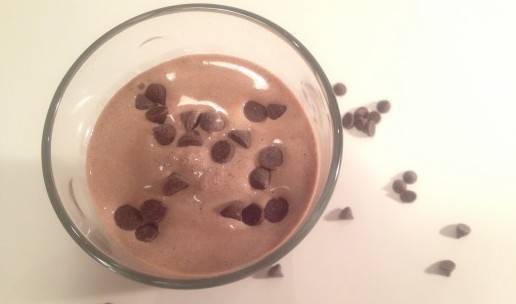
Thick and Creamy Chocolate Protein Shake

There's nothing like the satisfaction you get from sipping down a rich and chocolatey milkshake. But like all other tasty things in life, they are high in calories, sugar and fat and low in all the other amazing things like lean protein. Believe it or not, it is possible to turn your average chocolate protein powder in to a Thick and Creamy Chocolate Protein Shake without adding ice cream or a banana. Your first choice is to add Xantham Gum. It's an unflavored thickening agent used to change the consistency of a liquid. It's often used in salad dressings and sauces. Just add 1 teaspoon to 1 tablespoon to your shake before blending.

Another option is to use a blend of proteins including Casein. Casein is a milk protein that is naturally creamier than other protein powders when mixed in water. If you mix it with cream or milk it will be even thicker.

Finally, my favorite way to thicken up a shake is to use about a tablespoon of Sugar-Free/Fat-Free Instant Pudding mix. Add the pudding mix to your shake before blending. For an even thicker shake, add a bit of milk as well. The pudding mix comes in a ton of flavors (pistachio, cheesecake, vanilla, double chocolate, chocolate, butterscotch, banana, etc) making it easy to come up with new and interesting flavor combinations. Pudding mix can be found in the baking aisle of any local grocery store (besides Whole Foods because they don't carry anything that has artificial sweeteners added).

What's your favorite way to thicken up a shake? Have you ever used Xantham Gum or instant pudding mix?

Thick and Creamy Chocolate Protein Shake

Prep time 5 minutes - Makes 1 serving

Ingredients:

1 1/2 scoops chocolate protein powder (I used a blend of whey protein isolate, egg white protein, and casein) 1 tablespoon chocolate Sugar-Free Fat-Free Instant Pudding Mix 1/2 cup milk or cream ice 1 tablespoon Carob Chips (optional)

Directions:

The best way that I've found to make a well-blended protein shake that does not have fruit is to put your dry ingredients in to the blender first. Add your liquid and a few pieces of ice. Cover and pulse a few times. Then add more ice and pulse in until ice is broken well. Add more ice and continue to pulse. Blend until smooth and creamy. Add a bit more liquid if your shake is too thick.

Top with carob chips for a yummy, crunchy treat.

Enjoy!

Lemon Poppyseed Muffins

There's not much I can say, it's a cold Friday morning. We've had snow...the snow is now melting...the sun is shining. And this weekend is supposed to reach 60! Finally, getting back to our regularly scheduled weather. Enough of these hurricanes and nor'easters. But what trumps the cold weather - today is Friday and that means the weekend is almost here - yay! Anyway, let's cut to the chase. Over the weekend I was thumbing through some cookbooks and came across a recipe for Lemon and Poppyseed Muffins. I thought to myself, oh yum these would be tasty and something out of the norm. Of course, I had to swap out some of the regular ingredients for lower cal versions.

Using buttermilk instead of regular milk helped keep these low cal muffins super moist. The hint of lemon and sweetness make them the perfect morning munchie or afternoon snack. And right out of the oven, the muffin tops are crisp and crunchy - the best part in my opinion. The biggest swaps - I traded white rice flour for oat flour and regular sugar for Truvia's Baking Blend.

They're not paleo though. If you want something paleo, try my Moist Paleo Pumpkin Muffins. They are good too.

Inspired by the cookbook Cook Yourself Thin: Skinny Meals You Can Make In Minutes

Slimmed Down Lemon and Poppyseed Muffins

Prep time 15 minutes - Bake time 30 minutes - Makes 12-15 muffins

Ingredients:

1 1/2 cups oat flour 1 1/2 cups almond flour 2 teaspoons baking powder 1 teaspoon baking soda 1/4 teaspoon sea salt 1 tablespoon poppy seeds zest of 1 large lemon 2 cups peeled and finely grated zucchini 3 large eggs 1/2 cup of reduced fat buttermilk 1/4 cup + 2 tablespoons stevia/sugar blend (I used Truvia baking blend) 2 teaspoons lemon extract

Directions:

Start by preheating your oven to 350 degrees F. Then line a muffin tray with paper liners and spray lightly with cooking spray.

Combine the dry ingredients (flour, almonds, baking powder, baking soda, salt, poppy seeds) and set aside.

In a small bowl, combine the lemon zest and the zucchini.

Beat the eggs and sugar with a handheld or standing mixer for 3 minutes, until pale and creamy. Then add the zucchini, lemon zest, and lemon extract and beat again. Using a spatula beat in the dry ingredients until they are mixed in working quickly.

Spoon batter in to muffins tins and fill to the top so that they have a nice muffin top. Bake for 30 minutes. Remove from oven, let cool, and serve.

Nutrition Facts Per ServingCalories 199, Calories from fat 87, Total Fat 9g, Sat. fat 1g, Trans fat 0g, Cholesterol 43mg, Sodium 211mg, Total Carbohydrate 19g, Dietary Fiber 3g, Sugars 2g, Protein 8g, Iron 1.8mg Source: Nutritiondata.com

Quick and Easy Zucchini Lasagna for One

Ever since having the real thing [homemade Lasagna] at Rich's Mom's house for Sunday night dinner last week, I've been craving another slice of heavenly Italian goodness. Only problem is Lasagna is a meal you can only have a few times a year. It's just so heavy and so full of calories - but oh-so-good you can't stop eating. Before you know it, your stomach is full of Lasagna you didn't know you had room for (at least that's what happens to me)!

I've heard you can make Lasagna using Zucchini slices in place of noodles. I thought I'd take a stab at it and hopefully fulfill my craving. But then I thought, I need some meat in my Lasagna.

So then I thought about that fact that we eat turkey burgers almost daily at my house. They're quick and healthy - perfect for a busy schedule like mine. Rich usually makes my burger ahead of time that way when I get home from work or the gym I can easily pop it in the microwave. This gave me a great idea - use the already cooked turkey burger as the meat in my Lasagna, and use Zucchini as my noodles! Yum! So that's just what I did. I think next time I'm going to actually make a meat sauce of my own. Since I was cooking only for myself, I decided on a single serve option with little preparation required. This dish was delish and definitely satisfying.

Are you a Lasagna lover? How do you prefer to make it at home? Leave a comment below.

Quick and Easy Zucchini Lasagna for One

Prep time 15 minutes - cook time 15 minutes - makes 1 serving

Ingredients: 1 small 6-8 oz. can of regular tomato sauce 1 - 2 small Zucchinis sliced in to thin strips, like lasagna noodles 1/2 cup fat-free or low-fat Ricotta cheese 1/4 cup part-skim shredded Mozzarella cheese dash of salt dash of pepper dash of dried basil dash of dried parsley 1 - 4 ounce burger patty of your choice (or 4 ounces of cooked ground beef or turkey) Parmesan Cheese (optional - note: I was going to use this and totally forgot - bet it tastes good though)

Directions: Preheat oven to 400 degrees F.

Add tomato sauce to a small bowl. Mix in salt, pepper, basil and parsley. Set aside.

Start by lining the bottom of a small, single portion casserole dish with zucchini. Try to cover as much of the bottom as possible. Then add a layer of Ricotta cheese and a small amount of Mozzarella cheese. Cover with a layer of tomato sauce. Crumble the burger and layer on top of that. Repeat the layering and top off your Lasagna with the rest of the Mozzarella cheese.

Place casserole dish on cookie sheet in case you get any spillover. Place in the oven and back for 10-15 minutes or until the cheese is melted. Let cool for 5 minutes before digging in. Enjoy!

Nutrition Facts Per ServingCalories 550, Calories from fat 184, Total Fat 21g, Sat. fat 12g, Trans fat 0g, Cholesterol 130mg, Sodium 213mg, Total Carbohydrate 36g, Dietary Fiber 8g, Sugars 20g, Protein 60g, Iron 5.2mg Source: Nutritiondata.com

Kiwi Coconut Protein Smoothie

Hurricane Sandy has really put a damper on reality. Even the grocery stores are lined with barren shelves and day old bread. Sometimes you can find awesome deals though. Since the gas shortage has no end in sight, I decided to spend my time at home over the weekend. Opted for a noon run before lounging on the couch for the rest of the afternoon. Before that I did however use what is left in my gas tank to drive to the grocery store. Good thing it's only about 3 miles from my house. Since I knew I was going to go for a run soon as I got home from the store, I thought I'd take the opportunity [and time] to make a new post-workout protein shake. And 3 for $1 Kiwis sounded like the winning ingredient! What pairs well with Kiwis you ask? Strawberries of course. But I didn't really want to buy a whole carton of strawberries to only use 4. That's when it hit me - coconut! I've got coconut milk and shredded coconut at home! Sounds amazing! And amazing it was!

Perfect for a post-run meal - this smoothie is packed with lean protein and carbs our bodies need to replenish energy stores. On top of that, the tart and sweet flavor of the Kiwi was the perfect compliment to the smooth creaminess of the coconut. And the fact that it was green with little black dots made it oh-so-fun! Ok enough over-enthusiasm.  Here's the recipe:

Question: Do you like Kiwi? What's your favorite way to enjoy this sweet green fruit?

Kiwi Coconut Protein Smoothie

Prep time: 7-10 minutes - makes 1 serving

Ingredients:

2 kiwi, sliced and skin removed 1/2 cup unsweetened coconut milk 1 tablespoon vanilla sugar-free/fat-free instant pudding mix (powder) 1 scoop vanilla or unflavored whey protein 2 tablespoons shredded coconut ice

Directions:

Put all ingredients in a blender including 1 tablespoon shredded coconut. Blend until smooth. You may need more or less ice for thicker consistency of smoothie. Top with the rest of the shredded coconut and enjoy!

Nutrition Facts Per Serving Calories 358, Calories from fat 102, Total Fat 12g, Sat. fat 9g, Trans fat 0g, Cholesterol 0mg, Sodium 213mg, Total Carbohydrate 37g, Dietary Fiber 6g, Sugars 26g, Protein 30g, Iron 1.4mg Source: Nutritiondata.com

Healthy Stuffed Cabbage

A Jewish staple, stuffed cabbage is a delicate, melt-in-your-mouth pocket full of goodness that's loaded with equally as sinful calories. Whenever Rich and I go to Zan's Kosher Deli in Lake Grove, NY we share this fantastic meal. My mother gave me her old Vermont Cookbook - a collection of recipes that belonged to the women of Ohave Zedek Synagogue and I decided to take one of their Stuffed Cabbage recipes and reduce it! A recipe redux! Keep in mind this was my very first attempt - even though it tasted amazing, next time I plan to tweak some things.

What's your favorite cultural food? How can it be tweaked to make it healthier?

Healthy Stuffed Cabbage

Prep time: 20 min. - cook time: 50-60 min.- makes 6 servings

Filling:

1 lb. Ground meat (I used 85% fat-free natural) 1 whole egg 1 medium grated yellow onion 1/4 cup oat flour (if you don't have oat flour, you can grind oats in a blender) 2 tablespoons artificial sweetener (I used Nectresse) 1/2 teaspoon sea salt 2 tablespoons lemon juice

In a large bowl combine all ingredients.

Cabbage:

Place a head of cabbage in pot (remove core). Fill with hot water and cook for 10 minutes; drain. Pour cold water over cabbage; drain. Remove leaves. Fill and fold each leaf like an envelope. Then prepare sauce.

Sauce:

1 cup  tomato sauce 1 chopped yellow onion 2 tablespoons artificial sweetener (I used Nectresse) 1/4 cup lemon juice 1/2 teaspoon sea salt dash of pepper 1/2 cup raisins 3/4 cup water (to cover)

Cook together in a heavy pan for 5 minutes. Place cabbage envelopes in sauce. If envelopes are not covered, add the rest of the can of tomato sauce. Cook, covered, for 30 minutes on medium/high heat. Reduce heat; simmer for 20 minutes longer. Bake in oven at 250 degrees, uncovered, until brown.

Nutrition Facts provided by nutritiondata.com Nutrition per serving: Calories: 279, Total Fats: 13 g, Saturated Fat: 5 g, Trans Fat: 1 g, Cholesterol: 86 mg, Sodium: 676 mg, Total Carbohydrates: 23 g, Dietary Fiber: 4 g, Sugars: 10 g, Protein: 19 g, Iron: 2.9 mg

Chewy Healthy Granola Bars

Today we're getting hit by hurricane Sandy. I spent 26 of my 29 years of age in Florida living through some of the worst hurricanes to date. The ones that stand out off the top of my head are Andrew, Katrina and Rita. But I'm sure if I were to ask my parents, they'd remind me of dozens more growing up. When I moved to NY a little over 3 years ago I thought I had finally escaped hurricanes - wrong. Last year Hurricane Irene took a casualty - my car. It was flooded to death. Poor thing. And now, we're about to get hit by the mack daddy of all storms - Frankenstorm (aka Hurricane Sandy).

There's not much to do during a storm, but leading up to it you've got to prepare. Bring in lawn furniture, freeze ziploc baggies of water, tie down the Weber grill, bake and cook everything in your house. I decided I'd make a healthy snack packed with nutrients that needs no refrigeration and can be taken anywhere - Granola Bars! They are like the perfect go-to snack for any situation.

I'd almost refer to these bars as "everything but the kitchen sink" granola bars because you can throw in whatever you want. This recipe is packed with some of my favorite fruits and nuts.

How do you prepare for a storm? And what's your favorite thing to do to pass time when it's all going down?

Chewy Healthy Granola Bars

prep time: 10 minutes - bake time: 20 minutes - makes 9 bars

Dry Ingredients:

1 1/2 cup rolled oats 1/2 cup almond flour 1/4 cup flaxseed meal 2 scoops unflavored or vanilla protein powder (I used a protein blend of casein, whey and egg white protein) 1 1/2 cup chopped nuts of your choice (I used pepitas, sunflower seeds, cashews, walnuts and almonds) 3/4 cup dried fruit of your choice (I used strawberries, raisins, cranberries and cherries)

Wet Ingredients:

3/4 cup honey 2 tablespoons almond butter or peanut butter 1 whole egg

Directions:

Preheat oven to 350 degrees F. Line a 8 x 11" cake pan with parchment paper and spray with cooking spray.

In a large bowl combine all dry ingredients. Mix well with large spoon.

In a small bowl, lightly whisk egg. Then, in another bowl, combine honey and almond butter, microwave on high heat for 30-45 seconds until runny. Pour egg and honey/almond butter mixture in to dry ingredients. Stir until well combined. You may need to use your hands to make sure the mixture is well coated. The mixture should be quite sticky at this point.

Pour batter in to lined cake pan. Spread out with a spoon and press down with your hands until well packed. Place in the center of the oven and bake for 18-20 minutes until the top is lightly brown. Remove and let cool. Slice in to 9 bars and enjoy! You can store them in a air tight container for 2-3 weeks. Or wrap them individually in saran wrap for a quick grab-n-go snack!

Moist Paleo Pumpkin Muffins

It's fall, what do you expect? Pumpkin is a fall staple and what better way to celebrate fall than to eat pumpkin! I was going to go with Pumpkin bars, but then I thought it'd be more fun to put the batter in muffin tins. Enter, Moist Paleo Pumpkin Muffins. Personally, I'm not a strict Paleo person. However, I do like to keep carbs and sugars to a minimum when I'm baking. For this recipe, the only carbohydrate source is the pumpkin. All other ingredients fall under the "paleo" or "grain-free" and sugar-free categories. I have to admit though, after an entire day of recipe flops, I was a bit skeptical about this one turning out ok. To my surprise these little suckers are quite moist and tasty! For something that has no butter, no oil, no flour, and no sugar - they are quite delicious and you'd really never know.

Have a muffin for breakfast or afternoon snack - they've got just enough protein to keep you feeling satisfied. Top 'em with some plain non-fat greek yogurt for a clever and delicious post-workout meal!

What's your favorite fall food? Have you ever felt a bit self-conscious about your cooking?

Moist Paleo Pumpkin Muffins

Prep time: 10 min. - Cook time: 18-20 min. - Makes 12 servings

Ingredients:

1 cup canned pumpkin or pureed pumpkin 1 cup Almond Flour 1/3 cup vanilla protein powder (I used a whey/casein/egg white blend) 1/4 cup chopped Walnuts (optional) 1/2 teaspoon Baking Soda 1 teaspoon cinnamon 1/4 teaspoon sea salt 1 teaspoon nutmeg 1/2 teaspoon ground ginger 1/2 teaspoon all spice 2 tablespoons flaxseed meal 3 egg whites 1/2 cup unsweetened almond milk 2 tablespoons almond butter 1 teaspoon vanilla extract 2 tablespoons honey 2 tablespoons Nectresse or 2 more tablespoons Honey

Directions:

Heat oven to 350 degrees F. Lightly coat muffin tin with cooking spray.

Combine dry ingredients (including pumpkin) in a large mixing bowl.

Heat honey and almond butter in microwave safe dish for about 30 seconds. Stir until smooth. In a separate bowl, beat egg whites lightly and add vanilla extract. Pour wet ingredients in to dry ingredients and mix until well combined.

Pour batter evenly in to muffin tin. Bake for 18-20 minutes or until knife inserted in center comes out clean.

Nutrition facts provided by nutritiondata.com Nutrition per muffin: Calories: 114, Total Fats: 6 g, Saturated Fat: 1 g, Trans Fat: 0 g, Cholesterol: 0 mg, Sodium: 130 mg, Total Carbohydrates: 7 g, Dietary Fiber: 2 g, Sugars: 4 g, Protein: 8 g, Iron: 0.8 mg

Double Chocolate Mint Protein Balls

What's better than chocolate balls? Mint chocolate balls. Then again, that's only true if you like mint more than you like chocolate. I'm not sure which I like better but I do know one thing, these are amazing balls...or AMAZEBALLS! (Finally! A use for that word!)

Moving on. TGIF! That's right, it's Friday! Today is a rainy day here in NY but I'm not going to let the rain rain on my parade. I wish I could say that my Friday is going to be loaded with fun, relaxation and joy, but instead I get to say that my Friday is going to be spent at work, like the rest of the world. After work is a whole different story. Gonna grab a quick CrossFit workout, then straight home to catch new episodes of Say Yes to the Dress (yes, I'm one of those girls). And for dessert, a couple of Double Chocolate Mint Protein Balls!

Question of the day: What's your favorite thing about Fridays?

What's even more cool? These balls are grain-free, gluten-free, sugar-free and dairy free. You could call them Paleo if you want, I would.

Be careful making these balls, use only 1 teaspoon of mint extract, or else you may end up with a breath freshener instead of decadent treat.

Double Chocolate Mint Protein Balls

prep time: 15 minutes - cook time: none - makes 9 servings

Ingredients:

1/2 cup Almond Meal 1/4 cup Flaxseed meal 1 cup chocolate protein powder 1/4 cup extra dark unsweetened cocoa powder 1/4 teaspoon sea salt 1 teaspoon mint extract 1/4 cup cacao nibs 1/4 cup raw honey 1/4 cup water

Directions:

In a large bowl combine almond meal, flaxseed meal, 3/4 cup of the protein powder, sea salt, cocoa powder and cacao nibs. Stir with a large spoon until all ingredients are well dispersed.

In a microwave safe bowl, heat the honey for 15-20 seconds. Add extract to warm honey and stir. Then pour the honey mixture in to the dry ingredients; mix with a large spoon. Slowly add water and stir until batter gets sticky. Be careful not to add too much water. If batter is too sticky simply add a bit more protein powder.

Line a plate or cookie sheet with parchment. Place remaining protein powder in bowl. Scoop batter in to small 1-1.5 tablespoon size portions. Roll in to a ball in your hand, then roll in the protein powder for a nice chocolate dusting. Place balls on lined cookie sheet and allow to set in fridge for 20 minutes before serving.

Nutrition facts provided by nutritiondata.com Nutrition per serving: Calories: 119, Total Fats: 3 g, Saturated Fat: 1 g, Trans Fat: 0 g, Cholesterol: 0 mg, Sodium: 107 mg, Total Carbohydrates: 14 g, Dietary Fiber: 2 g, Sugars: 10 g, Protein: 11 g, Iron: 1.0 mg