Sliced Apples with Peanut Butter Yogurt Dip

So I saw something similar to this on Pinterest and I thought I'd give it a go. Forgive me for the iPhone photo, this was literally a photo of my snack yesterday. It was so delicious that I had to share and I was not in the mood to dirty up another bowl and plate for the sake of a colorful more appealing photo. So sue me. Anyway, apples and peanut butter are a staple snack for any healthy fit girl. This recipe for Peanut Butter Yogurt Dip puts a spin on the classic. Be forewarned, I did not measure anything exactly, just kinda took a spoon and eyeballed a good sized serving - enough to dip my entire plate of apple slices in. I will do my best to give you a guesstimate that ends up just as yummy as mine did.

sliced-apple_PBcinnamondip.jpg

Peanut Butter Cinnamon Yogurt Dip with Sliced Apples

makes 1 serving - prep time: 5 minutes - cook time: none

Ingredients:

  • 1/2 cup plain non-fat greek yogurt (I used Chobani)
  • dash of cinnamon
  • 2 teaspoons crunch peanut butter
  • 1 packet splenda

Instructions:

  1. Mix all in bowl until combined.
  2. Serve with sliced green apples.
Hummus and Homemade Pita Chips

Monday is my 30th birthday. Yep. 30. That being said, I wanted to put a little extra effort into celebrating this year. So I decided to have a small 30th birthday party for myself (with the help of my fiance Rich) at my house. And since I absolutely love Greek food that was my catering of choice. Only problem is that throwing a small party on a budget when you decide to cater the meal is quite difficult - especially in NY. What I ended up doing was ordering the large staple items from the caterer and made the rest myself (i.e. Hummus and Pita chips).

An order of hummus at the particular greek restaurant I chose was $22 and who knows if that even included pita! Two (2) cans of garbanzo beans at $0.75 each cost me only $1.50, 2 packs of whole wheat pita bread at $0.99 each, and a container of Tahini ($5) brings my total to $8.50 for this delicious appetizer. That's a savings of $13.50! Of course I had the rest of the ingredients in my pantry.

Making hummus and pita chips is super easy. If you don't have a food processor you can always use a blender. And you can totally get creative with the seasoning you put on your chips. I like to keep it simple with a sprinkle of salt, pepper and garlic powder. For sure these will be a big hit tomorrow at my party.

Homemade Hummus

makes 8 servings - prep time: 15 minutes - cook time: none

Ingredients:

  • 2 (15 oz) cans of Garbanzo beans (chickpeas)
  • 1/4 liquid from can of chickpeas
  • 3 tablespoons of lemon juice
  • 2 tablespoons of Tahini (sesame seed paste)
  • 1 teaspoon crushed garlic (2 cloves)
  • 1/2 teaspoon sea salt
  • 2 tablespoons olive oil
  • dash of paprika and olive oil

Instructions:

  1. Drain chickpeas and set aside liquid for later use.
  2. Combine ingredients in a blender of food processor. Add 1/4 cup of liquid from chickpeas and blend until smooth and thoroughly mixed.
  3. Place in a serving bowl. Garnish with 1-2 tablespoons of olive oil on top and a dash of paprika.
  4. Serve with homemade pita chips.
  5. Store in refrigerator covered for up to 2 weeks.


baked_pita_chips.jpg

Baked Whole Grain Pita Chips

makes 4-6 servings - prep time: 10 minutes - cook time: 14 min.

Ingredients: 

  • 4 pitas, whole wheat or white
  • 1/4 cup olive oil
  • 1/2 teaspoon garlic powder
  • dash of pepper
  • dash of salt

Instructions:

  1. Preheat your oven to 350 degrees
  2. Stack pitas and cut in half. Cut in half again and then in half again so that you get small chips.
  3. Place pita slices on baking sheet so they are not overlapping. Pour olive oil over the top. Then mix the pita slices around with your hands making sure each chip is coated with oil.
  4. Sprinkle salt, pepper and garlic powder on top and mix again with your hands to make sure each chip is seasoned.
  5. Bake for 7 minutes. Remove pan and flip each chip. Bake for another 7 minutes. Let cool on tray for 10 minutes before serving.
  6. Store in airtight container.

Crock Pot Beer Chicken

Merry Christmas Everyone! Today is an exciting day. I'm going to be celebrating the holiday with my fiance's family at his mother's home not far from here. It's only my second Christmas with Richie and his family and I think it's going to be a lot of fun. Then again, why wouldn't it be fun?! There's lots of presents...and who doesn't like presents. Not this girl. Thought I'd start today off with a recipe for Beer Chicken in the Crock Pot. I'm not a huge fan of beer, personally I'd prefer hard apple cider, but I decided to give this a go. Surprisingly, the chicken did taste like beer, though the house smelled amazing and NOT particularly like beer. Now that I think of it, next time I'll try using hard apple cider instead of beer. Don't get me wrong, beer chicken is delicious and when you cook it in the slow cooker, it's super tender and moist. If it were cooked on the bone it would fall right off, that's how tender it was.

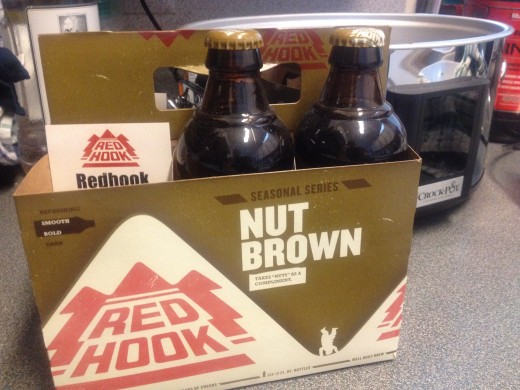
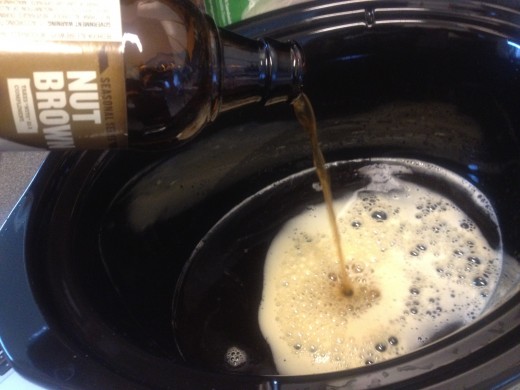
The best thing about a Crock Pot is how simple it is to make a large yummy meal. Set it and forget it! Remember that infomercial? Ugh, I'm getting old (more on that later). So here it is, Crock Pot Beer Chicken using whatever kind of beer you'd like. I used Red Hook's Nut Brown beer which is part of their seasonal series to which I no longer see on their website - it's all we had in the house. It's a great beer nonetheless if you are the beer drinking type. But by all means, try whichever type of beer you have, or better yet, use something else entirely other than beer. Anywho, here's the recipe:

Crockpot Beer Chicken

makes 4-6 servings - prep time: 5 minutes - cook time: 6.5 hrs

Ingredients:

  • 4-6 boneless skinless chicken breasts
  • 1 bottle (or can) of beer
  • 1 teaspoon powdered garlic
  • 1 teaspoon basil
  • 1 teaspoon paprika
  • 1 teaspoon black pepper
  • 1 teaspoon kosher sea salt
  • 1 teaspoon onion powder

Instructions:

  1. Mix all ingredients in Crock Pot
  2. Add chicken in one layer, nestle in to liquid
  3. Set on low and cook for 6-8 hours or until tender

Crock Pot Smoked Flank Steak

IMG_0903-e1355935107638.jpg

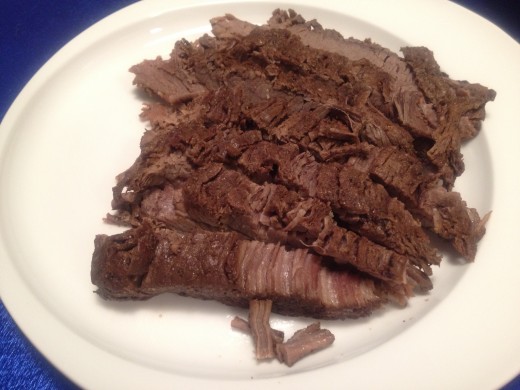
The only thing I regret about this recipe is the fact that I completely failed at taking attractive photos of it. Steak is a favorite in my house and when this sucker came out of the crock pot, Rich and I couldn't wait to get our hands on it. So much so that we ate most of it before I realized I hadn't yet taken any photos for my blog! I ended up taking photos of what was left on the cutting board. I think it demonstrates how tender the meat was. (wishful thinking?)

Attractive photo or not, this recipe is a fail-proof crowd pleaser that melts in your mouth. It's smoking without the smoker! All you need is a crock pot, a few simple ingredients and time to let it cook. Low and slow is the way to go! lol

Crockpot Smoked Flank Steak

makes 4-6 servings - prep time: 10 minutes - cook time: 6.5 hrs

Ingredients:

  • 1/2 cup Worcestershire Sauce
  • 1/4 cup liquid smoke
  • 1/4 cup low sodium soy sauce
  • 1 tablespoon ground black pepper
  • 2 tablespoons garlic powder
  • 2 tablespoons onion powder
  • 1/4 cup water
  • 2 lbs grass fed Flank Steak (or smaller if you have a smaller crock pot)
  • 1 tablespoon Olive Oil

Instructions:

  1. Pour olive oil into heated pan on stove top. Sear meat for 2-3 minutes on each side.
  2. Place all ingredients (excluding meat) in Crock Pot and stir well.
  3. Settle seared meat into the mixture in the Crock Pot making sure your steak is well immersed in the sauce.
  4. Set Crock Pot on low heat and cook for 6-8 hours.
  5. Remove and slice against the grain.

Crock Pot Pulled BBQ Chicken

After surfing the web for barbeque chicken recipes for the slow cooker and not finding anything that didn't call for bottled barbeque sauce, I decided to create my own. This recipe is super simple. Mix all ingredients in the crock pot itself. Add your chicken breasts and try to keep them as one layer. Cook for 6-8 hours or until your chicken falls apart easily. Shred with 2 forks and drizzle with leftover sauce.

For my first attempt at chicken in the crock pot I give myself an A+! Crock Pot Pulled BBQ Chicken was juicy and tender and definitely tasted like barbeque. I left out the cayenne pepper because my fiance is not a fan of spicy food, but next time I think I'll throw it in for a bit of a kick.  Enjoy!

Crockpot Pulled BBQ Chicken

makes 6-8 servings - prep time: 5 minutes - cook time: 6.5 hrs

Ingredients:

  • 1 (15 oz.) can tomato sauce
  • 1/4 cup white vinegar
  • 1 tablespoon smoked paprika
  • 1 teaspoon garlic powder
  • 1/4 cup Worcestershire sauce
  • 1/2 teaspoon sea salt
  • 1/2 teaspoon pepper
  • 1 tablespoon onion powder
  • 1 tablespoon ground mustard
  • 1 1/2 teaspoon Truvia/Sugar blend
  • 1/4 cup water
  • 1 tablespoon ground cayenne pepper (optional)
  • 4-6 chicken breasts

Instructions:

  1. Add all ingredients to the crock pot. Stir well.
  2. Place chicken breasts in the bottom of the pan aligning them in one layer. Cover the crock pot and set on low heat for 6-8 hours.
  3. After 4 hours have passed, flip the chicken over but be sure they remain as one single layer.
  4. The chicken is done cooking if it pulls apart easily with a fork.
  5. Put all cooked chicken in to a bowl. With two forks pull apart the chicken. Top with sauce that it was cooked in.

Sweet Potato Latkes

sweet-potato-latkes
sweet-potato-latkes

This year is my second year celebrating Hanukkah with Rich. Last year we didn't live together so I didn't get to share some of the traditions that my family has brought me up with. One of those traditions is that for at least one night of Hanukkah my mom will cook a big dinner, and special on the menu is Latkes.

Latkes are potato pancakes fried in oil to recognize the ancient oil (only enough for one day) that burned for 8 days. Thus the reason there are 8 days of Hanukkah.

Now that we're living together, now is the perfect time to start making our own traditions. So tonight I'm making a big dinner consisting of Beef Brisket (in the slow cooker that I got last night for Hanukkah), Sweet Potato Latkes, and steamed green beans. For dessert I'm making a low(er) calorie Apple Pie straight from the December 2012 issue of Oxygen Magazine. I'll let you know how that one goes too.

I'm making my latkes with sweet potatoes to up the nutrition factor and will fry them in Coconut Oil instead of Shortening.

Sweet Potato Latkes are great for any dinner and would be delicious for breakfast with a fried egg on top and some turkey bacon on the side.

Sweet Potato Latkes, Beef Brisket and Steamed Green Beans

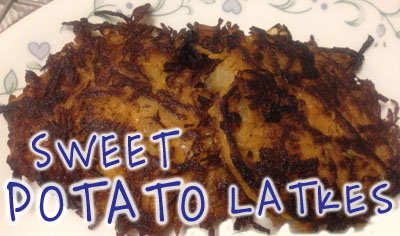
Update: dinner was delish! And the Sweet Potato Latkes were a big hit. They were soft on the inside and crunchy on the outside with a mildly sweet center and a hint of coconut. I served them with apple sauce but they were perfect by themselves. Enjoy!

Sweet Potato Latkes
Sweet Potato Latkes

Sweet Potato Latkes

Prep time: 90 minutes - Cook time: 10-20 minutes - makes 12 Latkes

Ingredients: - 2 medium sweet potatoes, grated - 1 medium onion, diced - 2 eggs, beaten - 1 tablespoon whole wheat flour - 1 teaspoon sea salt - pinch of pepper - spoonful of coconut oil

Directions:

Peel potatoes and onion; soak for 1 hour in a bowl of water in the refrigerator.

Remove potatoes and onion from water. Grate potatoes and drain excess juice. Dice the onion and add to sweet potatoes. Add eggs, flour, salt and pepper to the mixture; mix well.

In a large skillet, melt a spoonful of coconut oil on medium heat. Form pancakes using a spoonful of batter, fry on both sides for 3-5 minutes until golden brown and crispy. Serve with applesauce or cinnamon butter.

What's your favorite way to remake family tradition favorites?

Pumpkin Pie Dump Cake

Pumpkin Pie Cake is a hybrid cake-pie. Don't be afraid of the fact that you don't actually use the cake mix as directed on the box, but instead sprinkle the powdered cake mix on top of the pumpkin pie filling. I can't take credit for this incredible recipe - my little sister brought it home from her early childhood development class when she was in high school. What I learned from this recipe is - don't judge a dessert by it's recipe! This is one of the best pumpkin desserts of I've tasted and I it has been too long since I've had it last.

Warning: this recipe is not healthy what-so-ever...but it is so delicious! In fact, I'm not going to even attempt to calculate the nutritional profile. Desserts like this one I'd just rather not know.

Have you ever tried an odd dessert recipe like Pumpkin Pie cake?

Pumpkin Pie Dump Cake

Prep time: 20 min. - bake time: 70 minutes - makes 12 servings

Wet Ingredients: 4 eggs 1 - 15 ounce can of Pumpkin 3 cups evaporated milk 16 ounces of margarine (2 sticks)

Dry Ingredients: 1 1/2 cup sugar 1 teaspoon salt 2 teaspoons cinnamon 1 teaspoon ginger 1 teaspoon cloves 1 package of yellow cake mix 1 cup chopped walnuts (optional - I left these out because my Dad doesn't like nuts)

Directions: Preheat oven to 350 degrees F. Grease and flour a 9" x 13" cake pan. Beat eggs by hand or with a mixer. Add pumpkin, sugar, spices, and evaporated milk. Put the mixture in to the cake pan. Sprinkle the cake mix on top. Melt margarine in saucepan or microwave. Drizzle the melted margarine over the entire pie cake. Sprinkle with nuts if desired. Bake at 350 degrees for 1 hour and 10 minutes.

Let cool and enjoy. Can serve at room temperature or cold.

[nggallery id=1]

Thick and Creamy Chocolate Protein Shake

There's nothing like the satisfaction you get from sipping down a rich and chocolatey milkshake. But like all other tasty things in life, they are high in calories, sugar and fat and low in all the other amazing things like lean protein. Believe it or not, it is possible to turn your average chocolate protein powder in to a Thick and Creamy Chocolate Protein Shake without adding ice cream or a banana. Your first choice is to add Xantham Gum. It's an unflavored thickening agent used to change the consistency of a liquid. It's often used in salad dressings and sauces. Just add 1 teaspoon to 1 tablespoon to your shake before blending.

Another option is to use a blend of proteins including Casein. Casein is a milk protein that is naturally creamier than other protein powders when mixed in water. If you mix it with cream or milk it will be even thicker.

Finally, my favorite way to thicken up a shake is to use about a tablespoon of Sugar-Free/Fat-Free Instant Pudding mix. Add the pudding mix to your shake before blending. For an even thicker shake, add a bit of milk as well. The pudding mix comes in a ton of flavors (pistachio, cheesecake, vanilla, double chocolate, chocolate, butterscotch, banana, etc) making it easy to come up with new and interesting flavor combinations. Pudding mix can be found in the baking aisle of any local grocery store (besides Whole Foods because they don't carry anything that has artificial sweeteners added).

What's your favorite way to thicken up a shake? Have you ever used Xantham Gum or instant pudding mix?

Thick and Creamy Chocolate Protein Shake

Prep time 5 minutes - Makes 1 serving

Ingredients:

1 1/2 scoops chocolate protein powder (I used a blend of whey protein isolate, egg white protein, and casein) 1 tablespoon chocolate Sugar-Free Fat-Free Instant Pudding Mix 1/2 cup milk or cream ice 1 tablespoon Carob Chips (optional)

Directions:

The best way that I've found to make a well-blended protein shake that does not have fruit is to put your dry ingredients in to the blender first. Add your liquid and a few pieces of ice. Cover and pulse a few times. Then add more ice and pulse in until ice is broken well. Add more ice and continue to pulse. Blend until smooth and creamy. Add a bit more liquid if your shake is too thick.

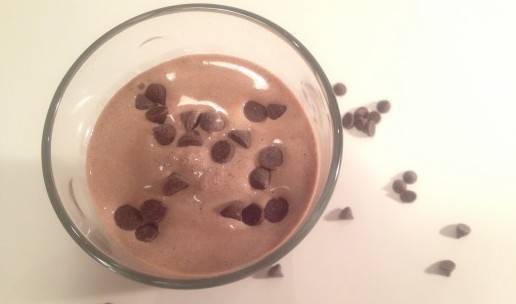
Top with carob chips for a yummy, crunchy treat.

Enjoy!